Jekyll is a static site generator that you can use to create simple sites or blogs and Github pages is a static site hosting service. By using Jekyll with Github pages, you can quite easily put together your first blog/website for free.
I created my first personal website using Jekyll and then went on to using wordpress and google sites. Eventually, I circled back to jekyll considering that it is free and that I have more control over how the appearance and features. Now I have no background of html, css or javascript but here’s how I managed to put together my own website:
- By diligently following tutorials
- By googling the errors whenever I encounter one and then fixing it based on solutions from forums such as stackoverflow
- Reaching out to others for help when really stuck
Sharing some quick steps so you can quickly set up your blog using jekyll. I’m using a mac, so the instructions are for those who have a mac. Feel free to google for a windows/linux version and also learn more about jekyll, git pages and so on.
Step 1: Install Jekyll on your machine
- Open terminal on mac
- Before installing jekyll, we need to ensure the correct version of ruby is installed on the machine because jekyll runs on ruby. (Ruby version must be 2.1 or higher)
To check the version of ruby installed, type
ruby -v
3. Now we need to check if the right version of gem is installed. To check the version of gem, type
gem -v
4. Now, you need to go ahead and install jekyll.
To install jekyll, type
gem install jekyll bundler
This should fetch all the jekyll files needed and install them.
5. Once the installation is done, check the version of jekyll installed by typing
jekyll -v
Step 2: Create a Jekyll Blog on your local machine
Name of the blog I’m going to create is 20percent and I’ll be demonstrating the following example with this name. Remember to change the name of your blog accordingly.
- Now to create a jekyll blog on local machine, open terminal and type
jekyll new 20percent
This will create a new folder on your computer for the blog. The folder’s name will be 20percent (or the name you had entered).

Now just search for “20percent” to locate the folder on your computer.
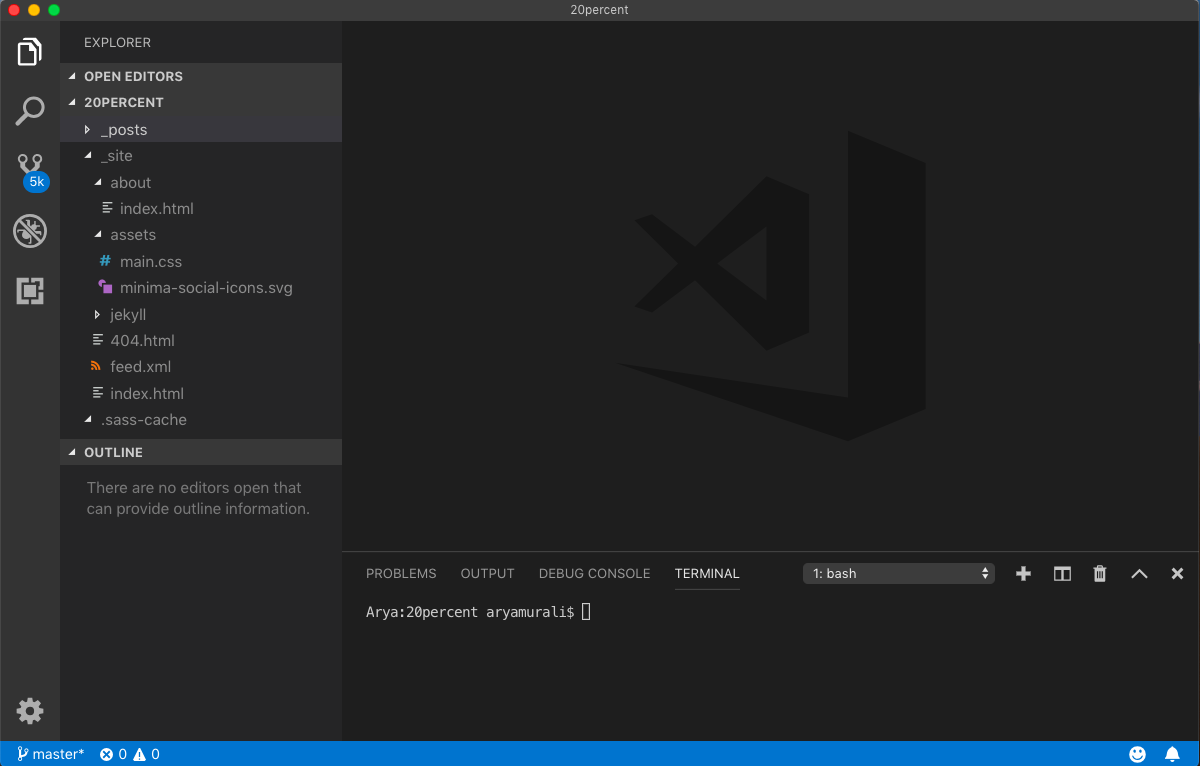
2. In order to edit the contents of this blog and publish it, I’m going to be using Visual Studio Code. This piece of software lets you use the terminal from the window, making it super easy to view all the files and edit it accordingly.
Install VSC if you haven’t already done it and then open your 20percent folder. You should now be able to see all the contents in your folder like in the image below.
3. Before we proceed towards figuring out how to edit the contents, let’s first publish the blog locally and see how it appears.
To do this, go to the terminal within VSC and type
bundle exec jekyll serve
Now, your site should be up and running on your local host: http://127.0.0.1:4000/
Meaning, if you go to this link, you’ll be able to see your blog.

Let’s now checkout the different folders that jekyll has created and understand how to edit them.

- _posts: This is the folder that has all your blog posts. Each of these posts should be a markdown file and should be included within this folder for it to be listed in your blog.
- _site: This files in this folder are responsible for compiling your blog. You basically have different blog posts, images, pages lying in different folders. The files in _sites folder bring them together and publish it as a website.
- _config.yml: This file contains your site’s variables such as title, your usernames, urls etc.
- about.md: This is just a markdown file that contains data to be published in your about section
- gemfile: gemfile contains all the dependencies for this site. Meaning you are using jekyll. And within jekyll, you are using it’s default theme called ‘Minima’. The gem file specifies such info.
- index.md: contains info that is visible in the home page of your blog.
To quickly make your blog ‘yours’ by adding info relevant to you, edit the following:
- Title, description and other details in _config.yml
- Content in about.md file
- Content in the blog post within _posts folder. You may also copy paste that file and edit its content to create your second blog post.
Now type jekyll serve to see these changes in your local host (http://127.0.0.1:4000/)
Note:
- Each time you edit content and want to see how it looks, type “jekyll serve” and see the results on the local host
- When your blog is being served, you may not be able to type on your terminal. To exit from current running process and type another command in your terminal, you will have to type Ctrl+C
So that’s about it in terms of editing the content. Feel free to play around and add more content as you wish.
Step 3: Publishing your blog using Github Pages
Now that you know how to set you blog locally and edit it, see the changes and all, it is time for us to publish the website so that the world can also see it.
We will use Github pages to host your site publicly. Yes, it is free 🙂
- Create a new github account.
- Create a new github repo and name it with same name as your local folder (in my case, 20percent)

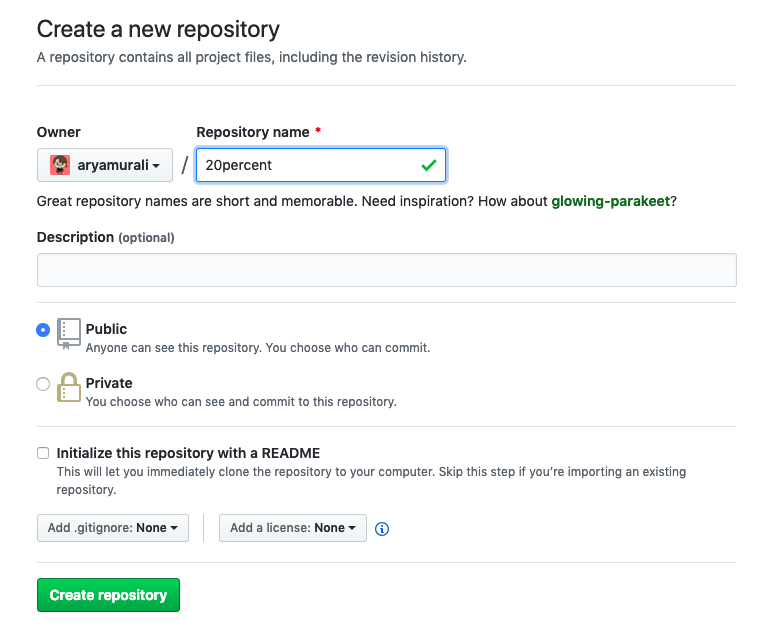
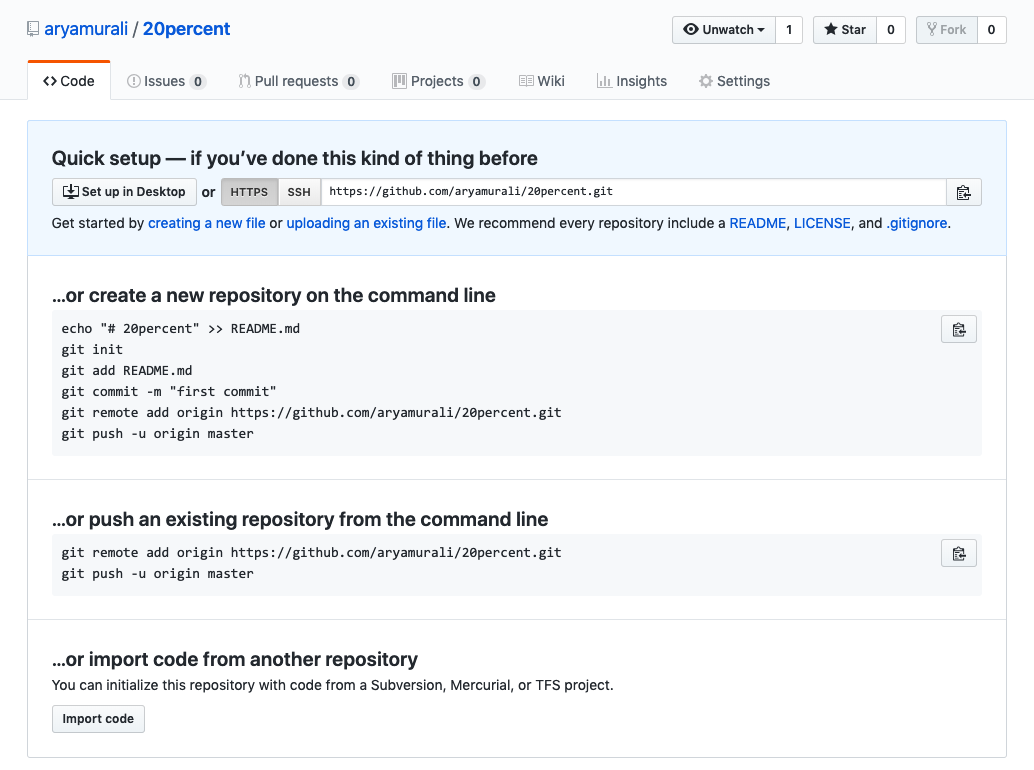
Once you create a new repo, you will see a page similar to what’s shown below.
Do not be intimidated by all those command. You don’t have to do all of that.
Now what we have to do is initialise our local git repository. (If you do not have git installed in your local machine, ensure that you have it installed)
To initialise your git repo, go to VSC, open terminal and type
git init
We need to now move all our blog files into the gh-pages branch. This is because gh-pages branch is where github looks for info about your blog.
To move the files to gh-pages, type
git checkout -b gh-pages
To check the status of the files in our local git, type
git status
You will now see a list of files in your git repo. All of them will be marked in red and this indicates that these files are not up to date. We need to now push all these files from your local git repo to the 20percent git repo.
To indicate that we wish to add all these files listed to the 20percent repo, type
git add .
Now we have to transfer or commit all these files to the repo. Type
git commit -m "initial commit"
Note that the part after -m is the commit message. This message is for you to indicate what this commit is about.
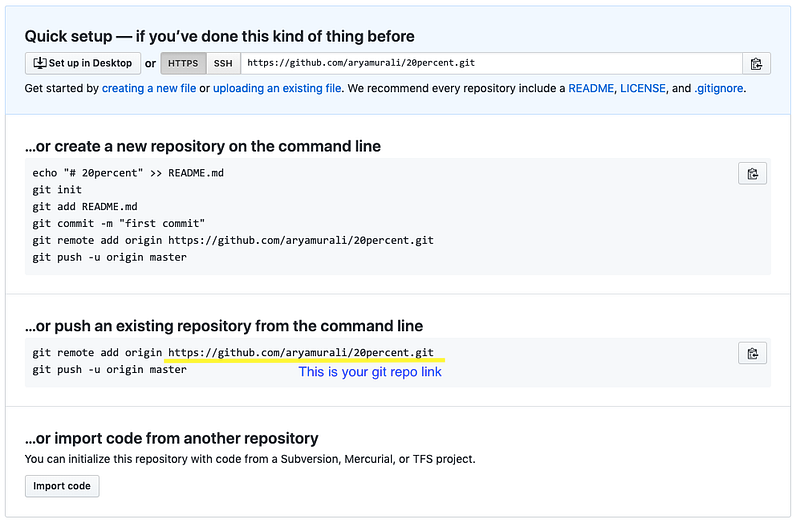
We have to now link the local repo with the 20percent repo. To do so, type
git remote add origin <git repo link>
You may find your git repo link from your repo created page as shown below.
So in my case, I will type
git remote add origin https://github.com/aryamurali/20percent.git
Now, we have to push all these files to the gh-pages branch of your 20percent repo. To do this, type
git push origin gh-pages
You may sometimes be asked to enter your login credentials to github. Just enter your github username and password if asked.
And you’re done.
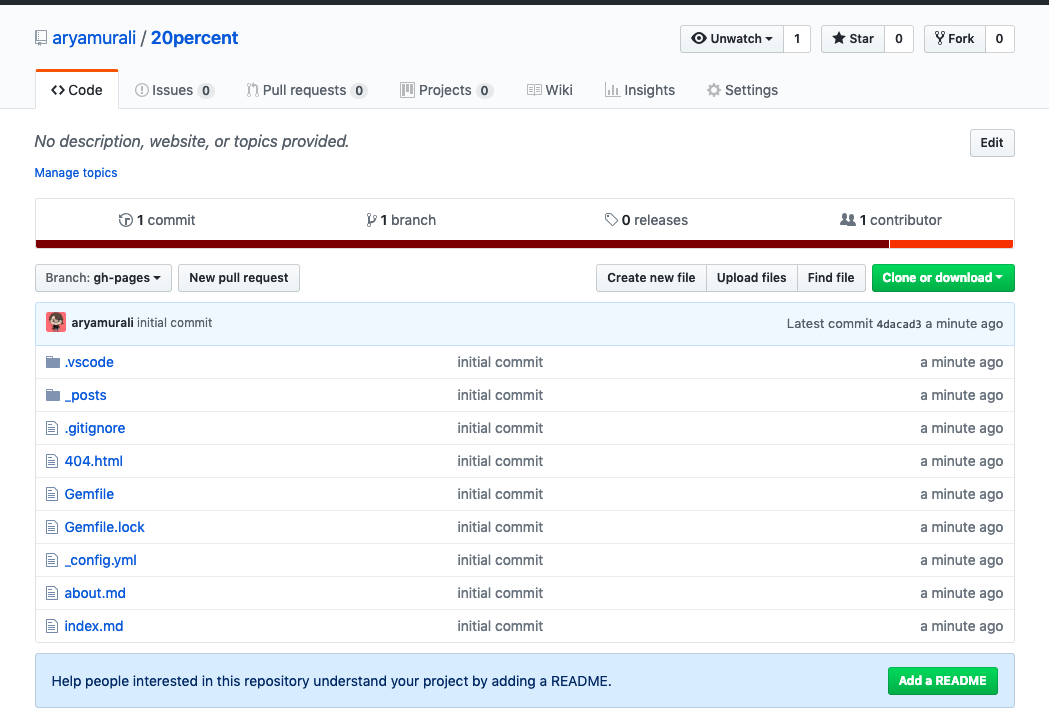
Now go to the link of your git repo and you should be able to see all your jekyll blog files there.
To access your published site, go to settings and find the ‘Github Pages’ section. You’ll see a message like this

Click on the link there and you will be able to see your published site!
Step 4: Keep chiseling on your blog
Now all that you have to do is keep making edits to your blog.
Each time you make some changes to blog files on your computer, do the following:
- Type ‘jekyll serve’ to preview your changes
- If you’re happy with the changes and want to publish, first collect all the files to publish by typing ‘git add .’
- Now make the commit by typing ‘git commit -m commit message’
- Finally, type ‘git push origin gh-pages’
That’s it!
Time to get cracking at your new blog. All the best 🙂
Some extra toppings: Setting up a domain name
Strongly recommend you purchasing a domain name from a website such as godaddy.in and pointing your website to that.
Something like aryamurali.com
Follow the help material below to set up domain name for your github pages + jekyll blog.
Note: If you purchased your domain from godaddy, your DNS provide is godaddy.
https://help.github.com/en/articles/quick-start-setting-up-a-custom-domain
Now have fun 🙂